Install Android Studio
Hub › Android › Beginner › Install Android Studio
Goal
Install Android Studio and create an empty Jetpack Compose project that builds and shows "Hello Android" in the preview pane. After this page you will have a working Android toolchain and a runnable starter project.
Prerequisites
- None. This is the first page of the Beginner tier.
What you're installing
Android Studio is the official IDE for Android. It bundles the Kotlin compiler, the Android SDK, an emulator, and the Compose preview renderer in one install. You don't install Kotlin separately and you don't install Gradle separately — both come with the IDE.
For everything Android Studio can do, see the official install guide. The two pieces we need now are the IDE itself and a project template called Empty Activity.
Install the IDE
- Download Android Studio from developer.android.com/studio. Pin version: Android Studio Koala Feature Drop (2024.1.2) or newer.
- Open the installer and accept the defaults. On first launch it downloads the SDK — this takes a few minutes.
- When the welcome screen appears, click New Project.
Create the project
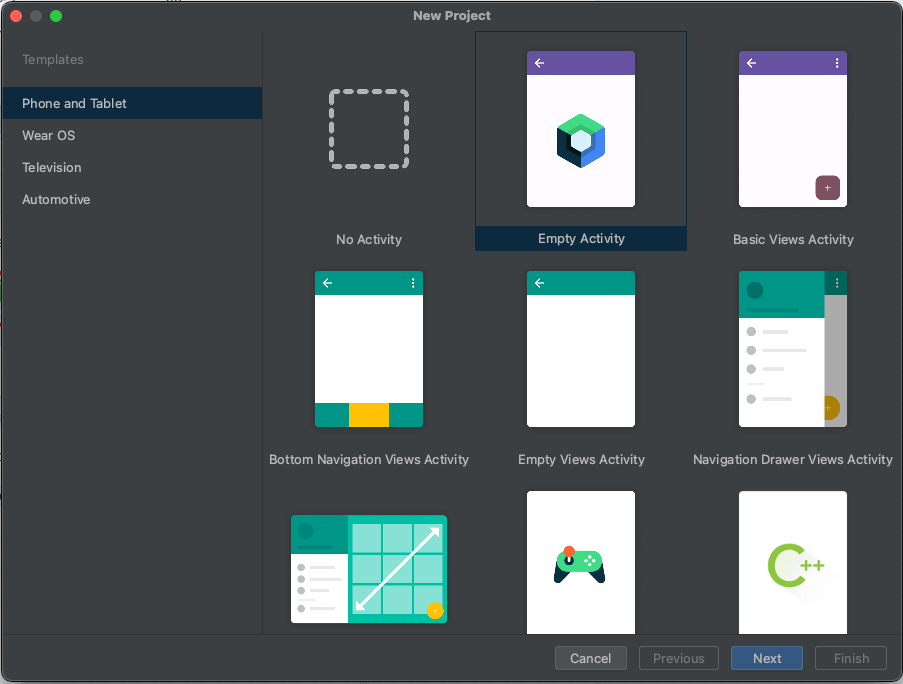
In the template picker, choose Empty Activity (the one with the Compose marker, not "Empty Views Activity").
On the next screen, fill:
- Name:
FirstApp - Package name:
com.example.firstapp - Save location: any folder you can write to
- Minimum SDK:
API 24(Android 7.0) - Build configuration language:
Kotlin DSL (build.gradle.kts)
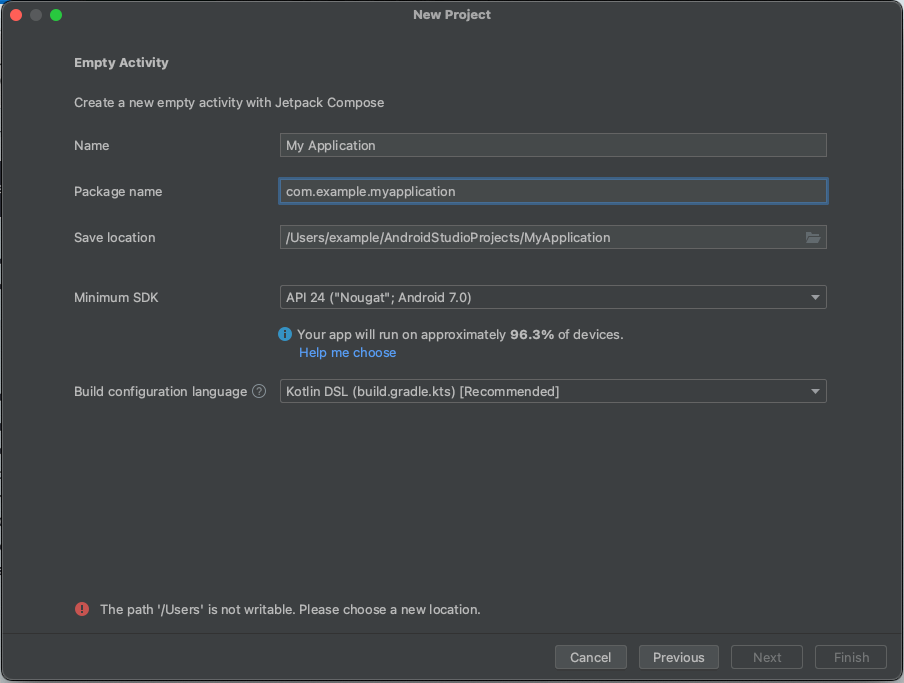
Click Finish. Android Studio downloads dependencies and opens the editor.
Confirm it builds
Open app/src/main/java/com/example/firstapp/MainActivity.kt. You should see a MainActivity class and a Greeting composable that says "Hello Android!".
Click the split-pane icon in the top right of the editor to open the Preview pane. You should see "Hello Android!" rendered. If you see a "Build & Refresh" prompt, click it.
If the preview renders, you're done. If it doesn't, check the Build tab at the bottom — Gradle will print why.